Students may use the Generate Schedule feature of Stellic to have the platform recommend class schedules for a semester. All undergraduate and graduate students may use the Generate Schedule feature by following the steps below.
STEP 1: Add Classes to My Courses in Scheduler
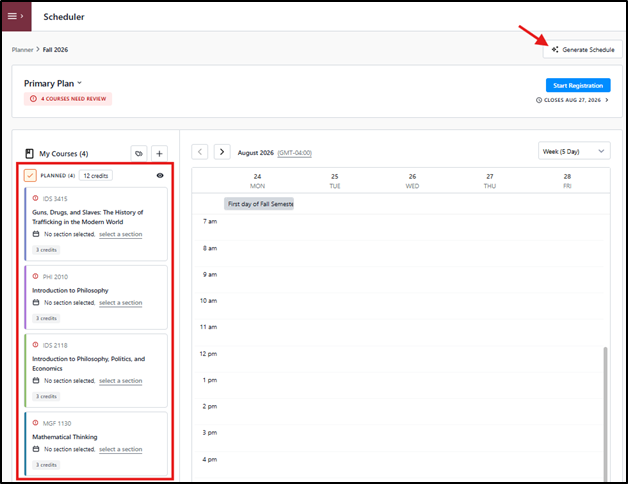
In the Scheduler, first just add the courses to your plan (without selecting a section) that you want to take. Then click the Generate Schedule button in the top right corner.
STEP 2: Select Class Preferences
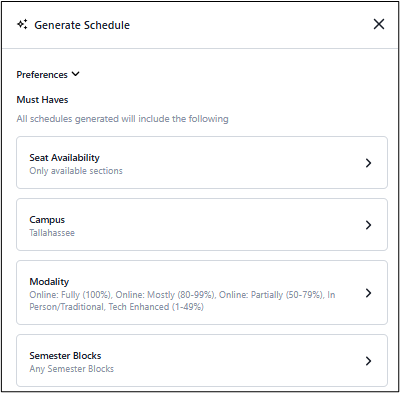
The Generate Schedule panel will open on the right. Within the panel you can enter any preferences for the class schedule. Preferences are split into two categories: Must Haves and Nice to Haves.
- Must Haves include settings for seat availability (open or closed classes), campus, modality (in person, online, etc) and semester blocks (sessions). The schedule options generated will always include the criteria you select in the Must Haves assuming there are sections available that meet the criteria.
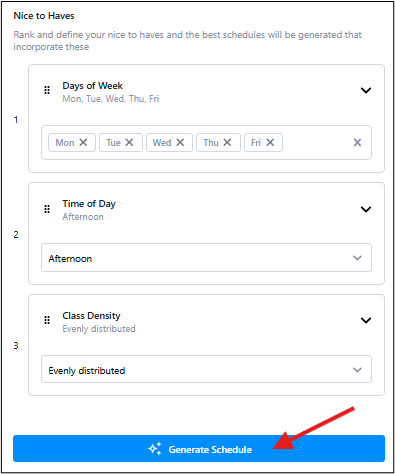
- Nice to Haves include preferences for days of week, time of day and class density (how evenly you want your classes distributed through the week). The system will do its best to find classes that meet your Nice to Have selections.
Default values for Must Haves and Nice to Haves are already selected. Click on a specific preference if you want to change the values.
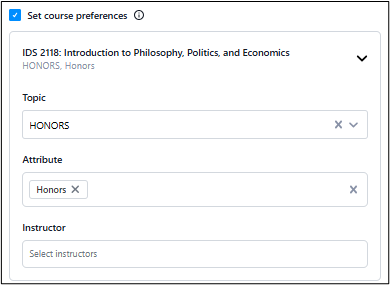
You may also check the Set Course Preference box to select preferences for specific courses in your schedule, such as a topic, attribute or certain instructor.
STEP 3: Generate Schedule Options
After you have selected any preferences, click the Generate Schedule button.
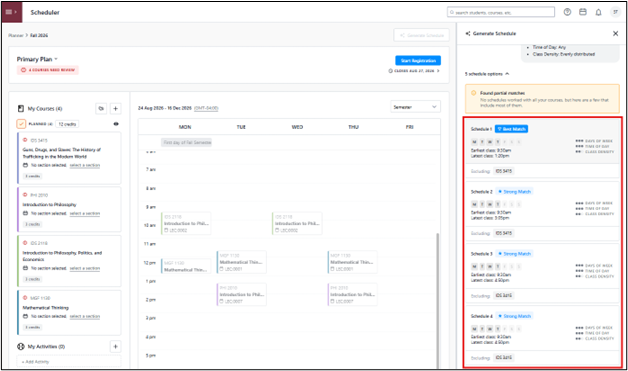
The list of schedule options will be displayed at the bottom of the panel. Depending on the number of schedule combinations possible for the courses/preferences you selected, Stellic will return up to 5 schedule options.
Hover over a schedule option to see the classes reflected in the Scheduler calendar. If you see a schedule option you like, just click on that schedule to add it to your plan and then proceed with Start Registration.
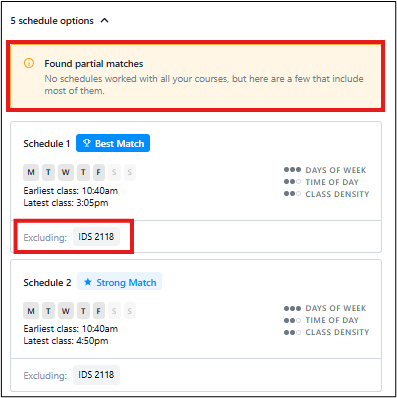
Note on Partial Schedules
If you see a note Found Partial Matches, no schedules were possible for all the courses and preferences you selected. The schedule options presented will only include some of the courses from your plan. Courses excluded from each option will be listed below; hover over the excluded course to see why it was not included.
If no full schedules are possible, you may try one of the more of the following options:
- Click the buttons for Edit Preferences or Reset to modify your Must Have and Nice to Have selections.
- Modify the courses you have in your Plan.
Expanding your preferences and/or changing your planned courses may present more schedule options.
Other Features
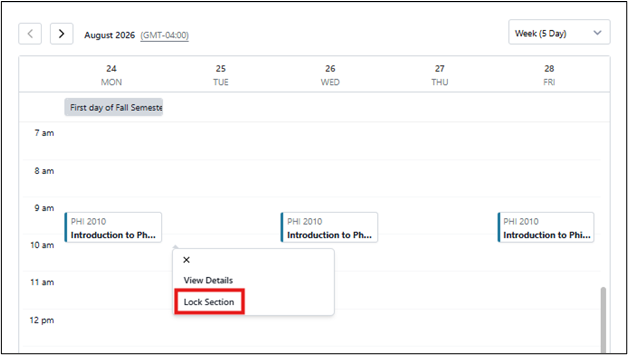
- Lock Sections: You may use the lock section functions if there is a specific section of a class that you want to be sure is included in all your generate schedule options. After selecting the section of the class in your plan, click on the class in the Scheduler calendar. Click Lock Section. A padlock will appear on the class to indicate its locked status. To remove a lock, click on the class in the calendar again and select Unlock Section.
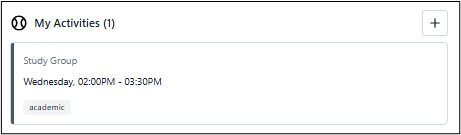
- Add Activities: You can use the My Activities feature to block time on your schedule for non-class related events, such as work or extra-curricular activities. Click on the + sign beside My Activities to add an activity to your calendar. Once created, the Activity will populate on the scheduler calendar. When you Generate Schedule, Stellic will try to find classes that fit around your activity.